chocolate chip cookies

tried to make the swiss roll again, but even with 2 hours of whipping the eggs hardly inflated. decided to give up, and make some chocolate chip cookies. these are amazing. the pictures should say it all.


the batter mixes up really easy, although i started with room temperature butter instead of cold, as instructed. but that was alright, it made for easy creaming with sugar. just in case you cant see how packed the dough is, here's a close-up.


there are about 200g worth of chocolate chunks (which i cut from bars), and 130g of chopped toasted cashew nuts in there. i cannot stress how chunky the dough was, and how those ingredients can't make for anything but a brilliant cookie.


you want to make 5cm balls, though i just used my measuring scale to make 55g balls, which yielded me about 16. next time i'll make them smaller; these cookies are so rich you really dont want such a large cookie. but with cold milk, they are brilliant.


as you can see, the cookies are rather large and puffed when out of the oven. when i baked the first batch, i had made it straight from the bowl (using rtp butter as mentioned before), so the cookies spread large and thin. thereafter i chilled the bowl in the fridge between batches, since i could only do 4 a batch, which resulted in a stiffer batter that did not spread out as much in the oven, and were puffier, as above. if you want a thinner, larger cookie, then use it straight from room temperature. otherwise, remember to chill it!

personally i prefer using a chilled batter because i love chewy cookies, although it was really nice thin as well. just a note: if you want chocolate that melts through the cookie, instead of a visible and distinct chip, then chop up your own chocolate. for cookies that spread this much, i find that self-chopped chunks make a better idea since the chocolate spreads out throughout. it's to your own preference, of course.

the original recipe calls for pecans etc, but i chose cashew nuts for their butteriness. chop them coarsely because this cookie needs a bit of texture to keep from being too cloying. the amount of brown sugar makes it moist and chewy, and the cookie has kept for 3 days now, to no ill effect.

try it out! mix in your favorite chocolate, dark or milk, and your favorite nuts. i would say though, no dried fruit in here, and not too much dark chocolate. i used a mix of 70% milk chocolate and 30% dark. it's a simple, comforting cookie, not the sophisticated sort and you want the sweetness and smooth feel of the milk chocolate to enhance it (:

swiss roll.

i made swiss rolls today! the second thing i've baked now that im back home. although i fancy some things about it could be improved, so im going to try it again tmr.

because i didnt have an electric whisk, i had to do the manual whisking. dear lord, that was tough. i shall try NOT to ever have to do that again. (kudos to you tiffy for making meringues by hand!) but since im baking this tmr i suppose im just being self-contradictory :x

instead of the 5-7 minues recommended whisking on high with the electric mixer, it took me 25 minutes to do it by hand. i fancy that's because i only got into the hang of it somewhere in the middle. but in any case, i got it to the ribbon-like consistency as mentioned; folded in the flour and oil and milk, and set it in a greased and lined long pan.


after baking (dont know how long, i just merely check every once in a while to check doneness with a toothpick) what you need to do is dust a teatowel with powdered sugar, cut the crusts off the cake, and sliced it to desired thickness. roll the cake in the towel with the topside on the outside of the roll, and leave to cool.


prepare a simple sugar syrup of 1 part water to 1 part sugar and brush it on the cake (inside roll) to prevent the cake from drying out. essentially this is just a traditional way of locking moisture in cake layers and swiss rolls, and will work for layer cakes as well.


after the cake has cooled, gently unroll. you can see the slight specks of powdered sugar on the outside of it. here's where you have to be really careful about not cracking the roll.


ta-da!


i peeled and cut the semi-ripe kiwis into strips that can be inserted into the roll before rolling.


horrors of horrors! i was so tired from manually whisking the meringue that i went out to buy sweetened READY whipped cream. do not get this though! it makes for cream that will dissolve and melt into cake later on and not be as visible as you would want it to be. i think the traditional route of making the cream yourself from whipping double cream would result in much tastier and prettier rolls.


smear the whipped cream on the cake in an even layer. you dont want it so thin you can't see it in the roll, but if you use too much, it's going to ooze out in the end and defeat the purpose in any case.

lay out the kiwi. i didnt take a piture of this, but what i did after was also to pipe cream between the rows of kiwi as well! it makes for a more even look i think.


here's what happens. the cream will ooze out anyway, but that's alright because you would want to cut off the ends anyway to even it out.


trimmed!


clingfilmed and fridged so that the cream sets and it looks better. i was really worried at this stage that it would flop and then i swear i'd cry.


and after it's unwrapped. i seriously think this might be one of the better things i've made. and one that both my parents liked, and now there's only one slice of it left :/ darnit.


and my dad said that taking a bite out of it would make a more picturesque shot, and so i indulge him.

recipe taken from here.


Swiss Roll


A spongy roll with custard spread and soft strawberries dipped in sugar syrup as filling, covered with chocolate ganache and a mild whipped cream flavoured with vanilla.

The strawberries were very soft, from the frozen batch leftover from the day we went strawberry picking (sooo... many... strawberries...). When defrosted (by leaving it at RTP) you get bags of pulpy, watery strawberries which are frankly disgusting to touch, but they still taste nice. Apart from that, if you eat these defrosting strawberries while they are still in this half icy-half pulpy stage, they feel like mini portions of strawberry sorbet. Mmm.

What to say, I still need to work on this 'piping' thing. I also think the whipped cream was whipped slightly past the ideal firmness. I am also proud of my arm power! Whipped the cream my hand until it became this thick. It is almost as satisfying as kneading a huge lump of dough.

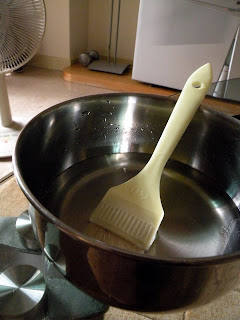
The candle fell off the cake and smudged off the icing! Notice the logcake-like texture of the chocolate ganache, courtesy of my pretty silicon brush.


We had just enough for a slice a person... a really mini cake. Interestingly, you only need to bake the sponge cake layer for 10minutes! And this is another recipe from that cookbook of mine using meringues, how terrible. What is her obsession with them??
Posted by Picasa

Kou Rou Pao


It's a sandwich of really white bread with really fatty pork. Another excuse to make quickbread :)


AKA Another use for the bun recipe. Kou rou recipe adapted from here. Because I don't believe in spending too much for a one-time dish, I replaced all the spices and herbs listed with 五香粉. I might have added too much though, it really smelt like the meat in 肉骨茶. I simmered the meat for at least 3 hours. Another note, belly pork is only available at oriental supermarkets, which means my usual grocery go-tos can only supply fatty meats that approximate the tenderness of kou rou. The recipe for the bao is exactly the same, only that we make the shape different.

Requires: Dough from recipe, some kou rou and lettuce.

1. make into a smooth ball. 2. flatten into oval shape, one half thinner than the other half. 3. spread some oil on the thin half. 4. fold fat half over thin half. place on wax square and steam 20 minutes.


Posted by Picasa

Red Bean Buns

How to make your own red bean buns, aka why I made red bean paste earlier. We followed a recipe from the internet for the buns but the paste from my recipe book. It's good that I have tons of experience making bread, because unlike what the recipe suggests, you will require a LOT more water than 1/2 cup. I always knead my dough for anything that I expect to turn out breadlike, making sure that the dough is flexible and smooth. End result? Follow the sequence of pictures. I give some extra notes that are not in the original recipe.


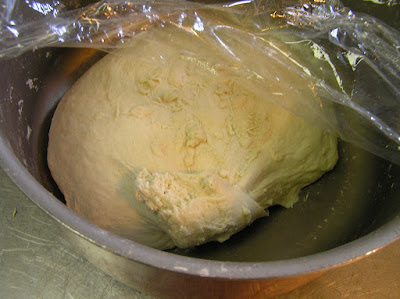
Before and after resting for 30 minutes. Resting is, according to most standard sources, a way to let the gluten in the dough relax, and to allow a more even mixing of water throughout the dough. When rolling dough out, if it starts shrinking back, the best bet is to let it rest! It just seems that all the tips about making better bread require you to have more patience, and to lengthen the amount of time taken to make it.

Get everything ready! Ensure your red bean paste hasn't dried out, by either covering it with glad wrap or reheating it and adding in water to make it more paste-like.

Roll out a lump of dough, making sure that the edges are more thinly rolled out than its center.


Fold the corners up, making a pleated pattern by stretching the outer region of the dough. This ensures that you don't end up with a really thick top and a thin, flat base in your bun.

Steam your buns on tiny little pieces of wax paper, so that they don't get ugly patterns from the base of the steamer.


Here you can see that we made the chunkier style of red bean paste, not the smooth silky version. I'm fine with either texture.

I was really surprised with the result, because the dough tasted perfect! Note that baking powder has an off-putting alkaline taste, which is disguised by the butter and sugar in the dough. So the recipe given has a very good balance of the ingredients, with a nice amount of fluffiness and no strong bitter aftertaste.

Potato with Tuna Pancakes

Just a little something from what I'm eating for my lunches/dinners since I've moved into my apartment...

My family used to eat these! But I'm not sure if it turned out exactly the same, because I just used cornstarch and water as the batter. There's some tuna mashed in with the potato.


These made excellent additions to my daily packed lunches, and kept well in the freezer. To reheat, just hit the express 1-minute option on the microwave. Apart from these, I usually end up making spicy tuna onigiri for a quick carb + protein combination.


Red Bean Paste

From my recipe book, which has lots of pictures so I can understand what to do...

粒あん
225g red beans
280g sugar
7g sugar syrup/honey/omit if desperate
some salt

1. wash beans in some water, don't throw it away!! bring it to a boil.
2. once boiling, add 1 cup water and let it be heated for 10 minutes
3. drain azuki beans, let it run under water for 5 minutes
4. put back in a pot and boil for 60 minutes, after which the beans should be squishy
5. add in the syrup/honey. heat it at high, stirring in the sugar.
6. add in the salt.
7. boil and simmer until you get the right thickness as required.